Lab 1: Populate Intent Data with Design Builder
Part 1. Introduction to Design Builder
1. In the VSCode window with “onug2025-design-workshop” opened (the one without the yellow border), expand on the “jobs” folder

2. Expand the “simple” folder

3. Open the __init__.py file (“jobs/simple/init.py”)
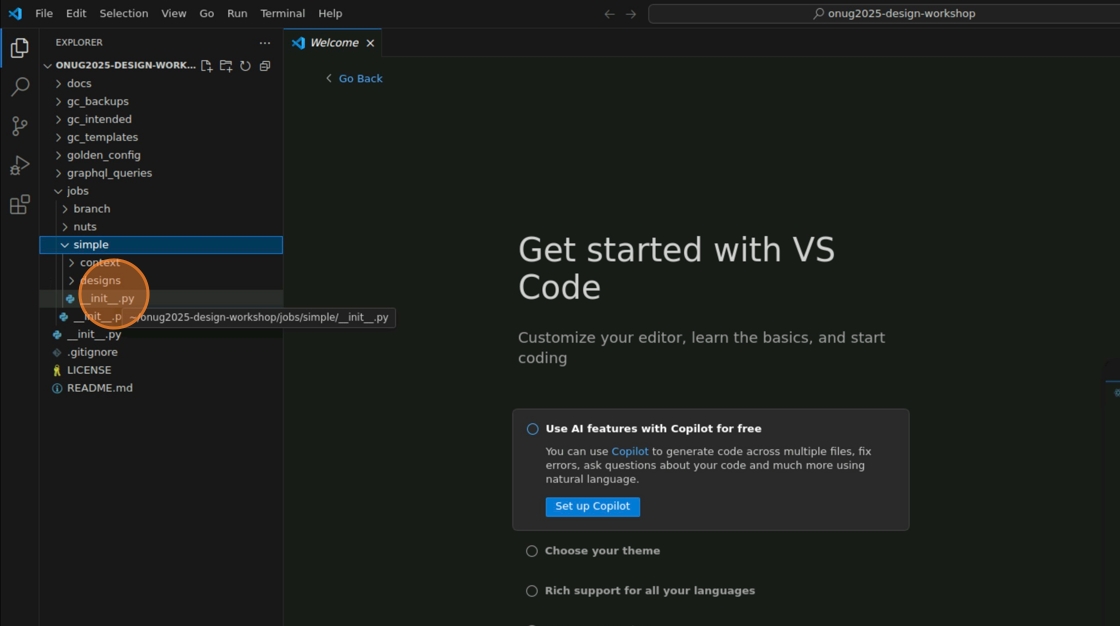
4. Here you may see the structure for a very simple Design Job with a single input: “manufacturer”

5. Now expand the “designs” folder

6. Double-click “0000_simpledesign.yaml.j2” to open it

7. This is a very simple example design. It will only create a Manufacturer object in Nautobot using the user input from before.
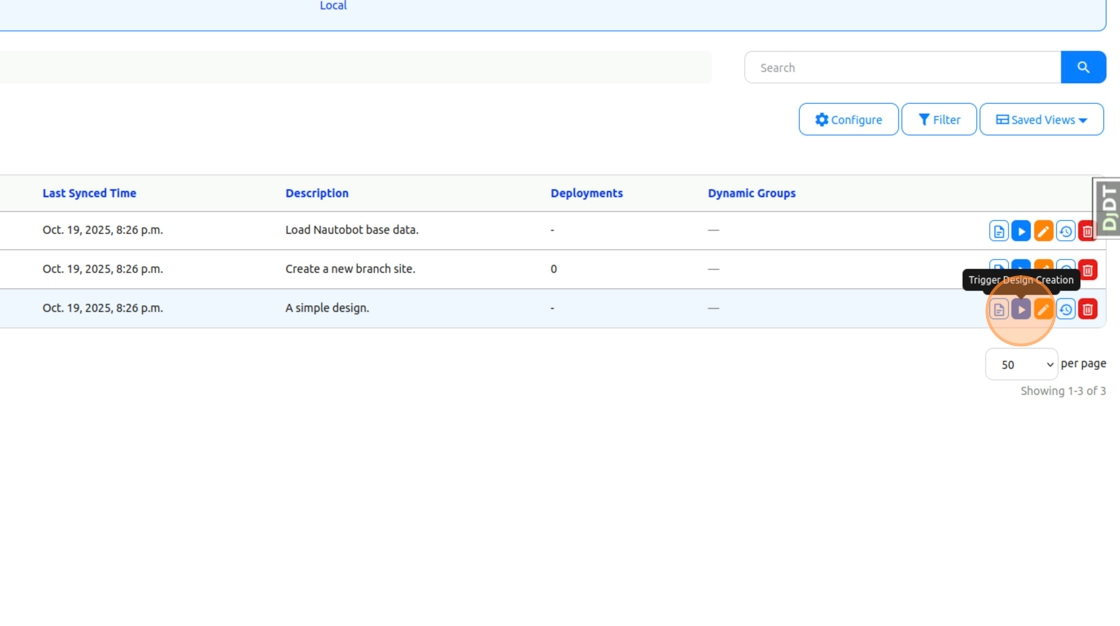
8. let’s run the Design. Go to Nautobot in your Browser. Click “Designs -> Designs” in the Navbar.

10. Click the play button next to “Simple Design” to execute the design

11. Click the “New manufacturer name” field
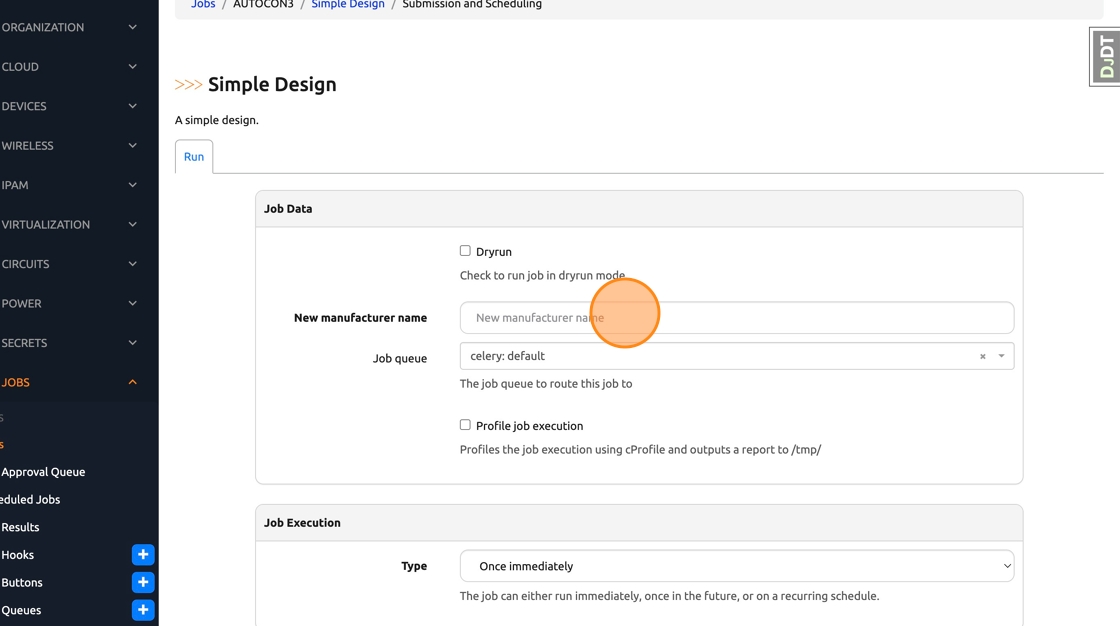
12. Type Cisco
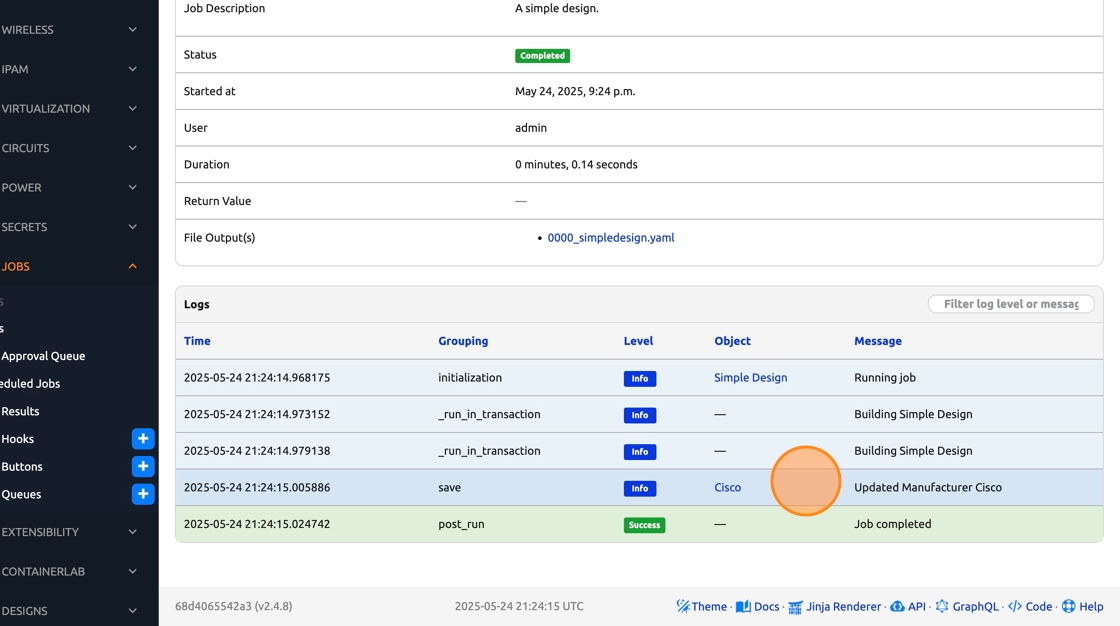
13. Click the blue “Run Job Now” button

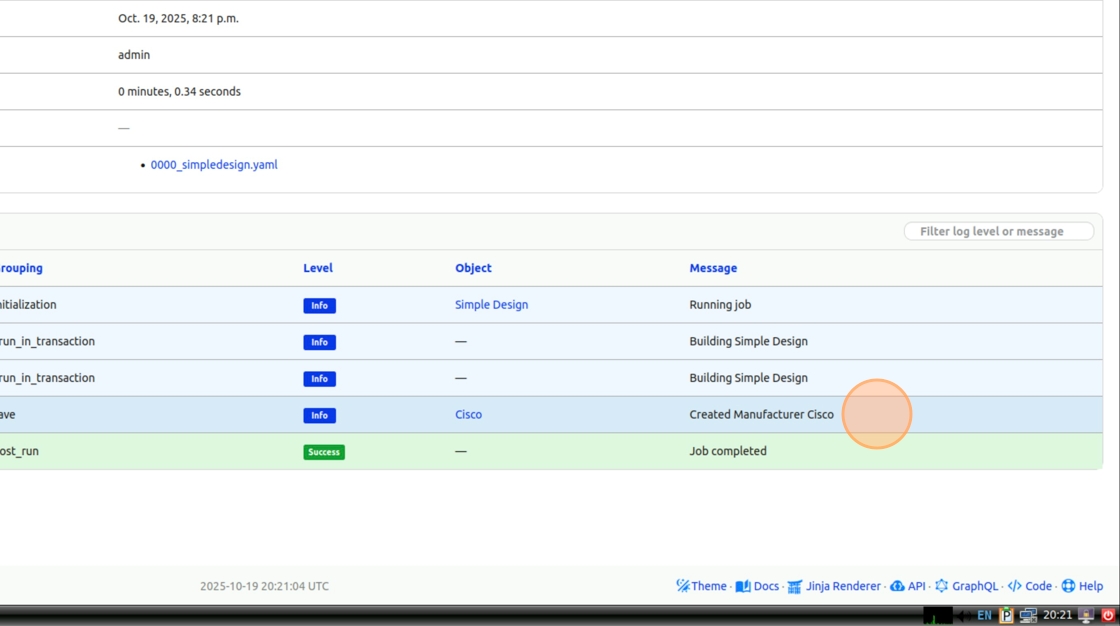
14. In the logs you can see that the manufacturer “Cisco” was created. What if we run the design again though?
16. Click the green “Re-Run” button to run the design a second time.

17. As you can see our previous inputs are automatically reused.

The Re-run button is only available when has_sensitive_variables is False on the Nautobot Jobs. This allows inputs to be saved and reused.
18. Click the blue “Run Job Now” button

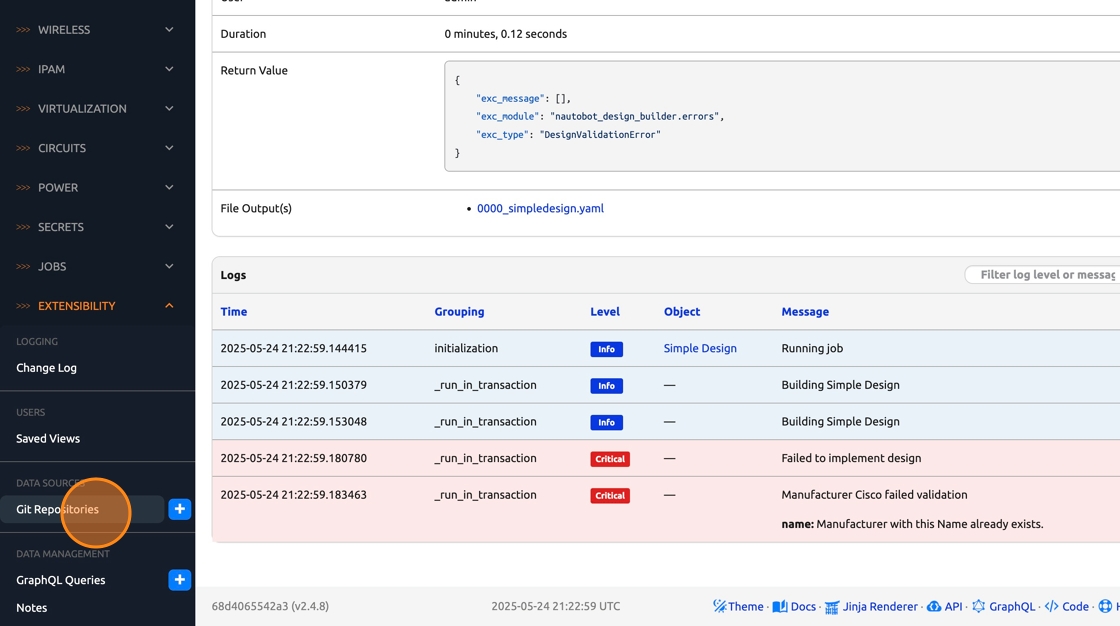
19. As you see, an error occurs: “Manufacturer with this Name already exists.”

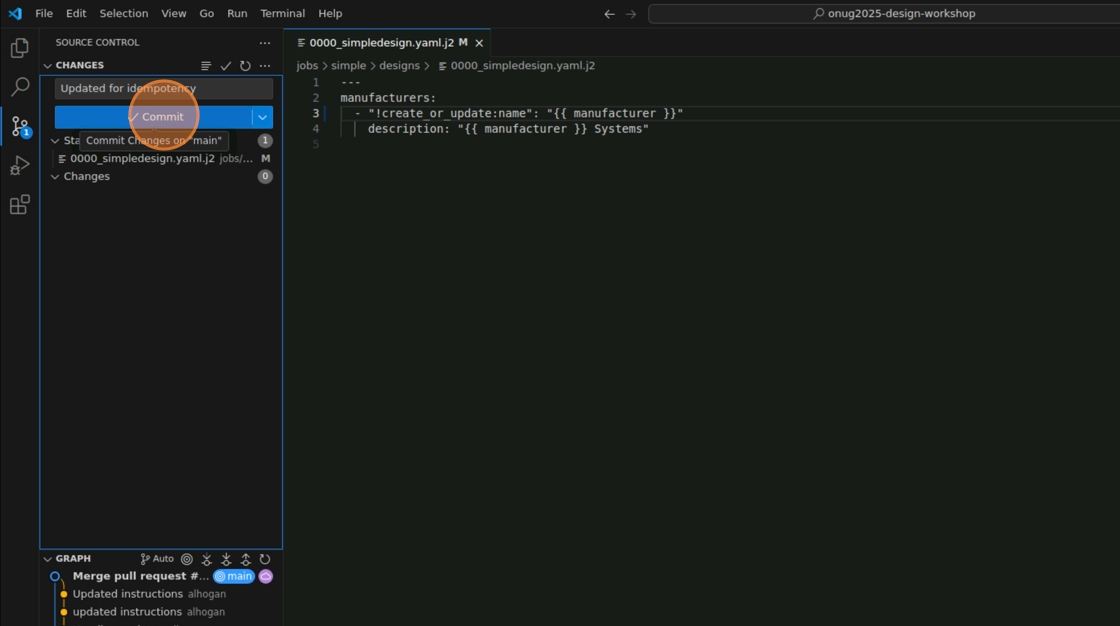
20. Let’s update the design idempotent, use the !create_or_update action tag when setting the Manufacturer’s name
# 0000_simpledesign.yaml.j2

---
manufacturers:
  - "!create_or_update:name": "{{ manufacturer }}"
    description: "{{ manufacturer }} Systems"
21. Save your changes and go to the “Source Control” tab in the left navbar in VSCode

22. Click the plus sign (+) next to the file “0000_simpledesign.yaml.j2” to stage your changes.

23. Type a commit message (ie Updated for idempotency) and then click on the “Commit” button
23. Click “Sync Changes”

Note: If this step fails open a new terminal and run the following commands before trying to sync again. git config --local user.name ntc and git config --local user.email ntc@networktocode.com

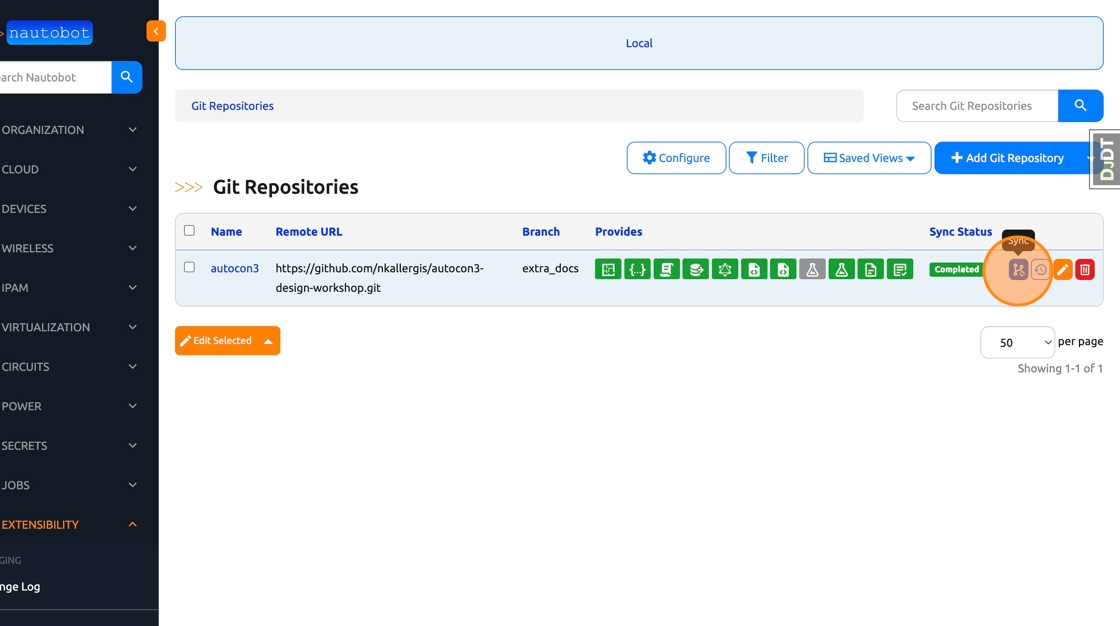
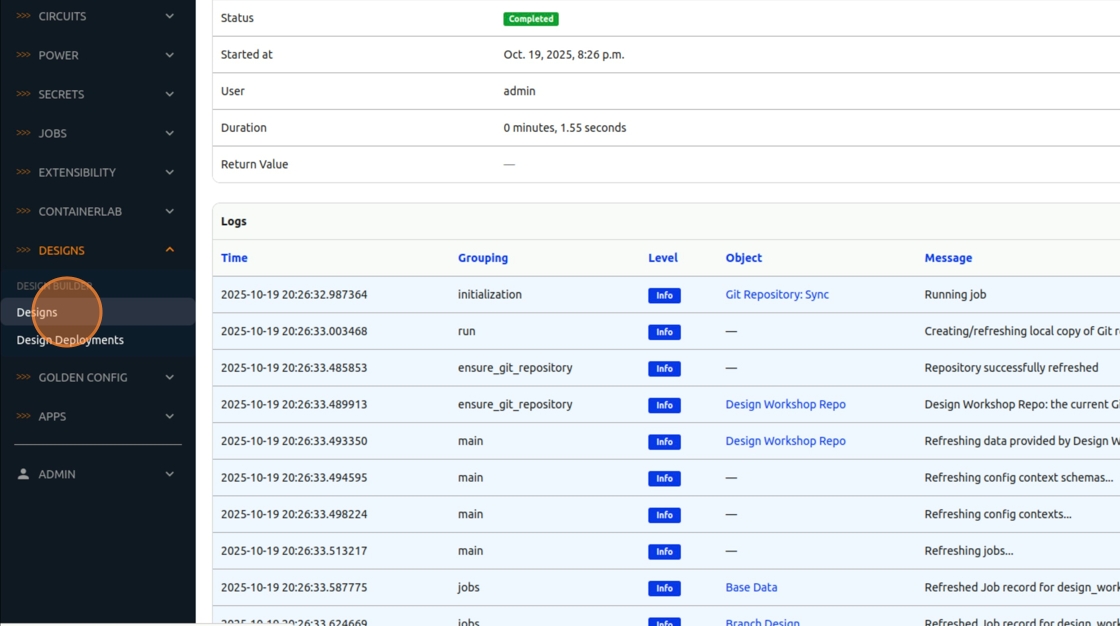
24. Navigate back to Nautobot in your browser, click “Extensibility -> Git Repositories”
26. Click the blue sync icon to sync the repo changes into Nautobot
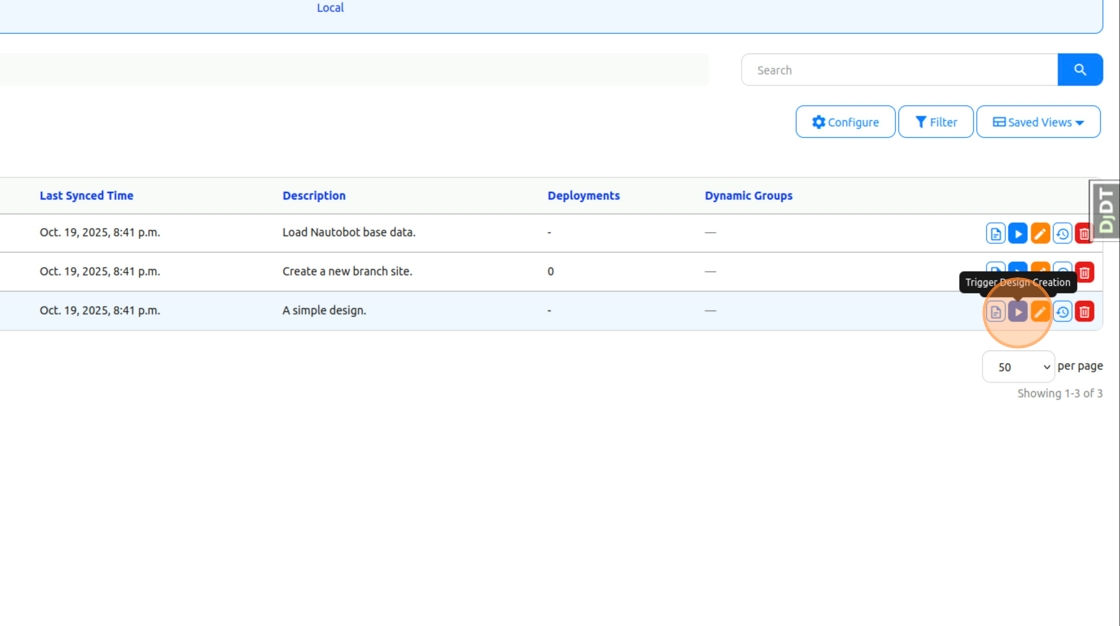
27. Click “Designs -> Designs” in the left navbar
29. Click the play button next to “Simple Design” to run the Job.
30. Click the “New manufacturer name” field.

31. Type Cisco
32. Click the blue “Run Job Now” button

33. As you can see in the logs, the design was successfully deployed in an idempotent manner
34. Let’s expand on our design. What about a platform for our manufacturer? You may see here that, using the dunder (double underscore), we can query for related objects
# 0000_simpledesign.yaml.j2

---
manufacturers:
  - "!create_or_update:name": "{{ manufacturer }}"
    description: "{{ manufacturer }} Systems"
    platforms:
      - "!create_or_update:name": "Cisco IOS"
        manufacturer__name: "{{ manufacturer }}"
        network_driver: "cisco_ios"

35. Before committing our changes, let’s see what Jinja2 can do for us here. Imagine that we want three sites in Athens, under Region Greece. Sure, we could add them one by one but what if there were 1,000 sites? Jinja allows us to use For loops for efficiency.
# 0000_simpledesign.yaml.j2

---
manufacturers:
  - "!create_or_update:name": "{{ manufacturer }}"
    description: "{{ manufacturer }} Systems"
    platforms:
      - "!create_or_update:name": "Cisco IOS"
        manufacturer__name: "{{ manufacturer }}"
        network_driver: "cisco_ios"

locations:
  - "!create_or_update:name": "Greece"
    location_type__name: "Region"
    status__name: "Active"
    children:
    {% for i in range(1,4) %}
      - "!create_or_update:name": "ATH0{{ i }}"
        location_type__name: "Site"
        status__name: "Active"
    {% endfor %}

36. Save your changes
37. Click the plus sign (+) next to the file “0000_simpledesign.yaml.j2” to stage your changes.

38. Type a commit message (ie “Added platform and location”) and then click on the “Commit” button.

38. Click “Sync Changes”

39. Let’s sync these latest changes into Nautobot. Navigate to Nautobot in your browser and click “Extensibility -> Git Repositories”

41. Click the sync button for our Design Workshop Repo.

42. Click “Designs -> Designs” in the left navbar

44. Run the “Simple Design” Design one last time
45. Click the “New manufacturer name” field.

46. Type Cisco
47. Click “Run Job Now”

48. As you can see, the top-level entry (location Greece) has been created

49. Click “Greece”

50. Along with the location Greece, we also have the 3 sites (ATH01, ATH02, and ATH03) that we defined in our Jinja2 for loop!

| ⬅️ Previous | 🏠 Home | Next ➡️ |